Monday, October 8, 2012

Up To The Highest Heights, Let's Go Drag a Kite?

With tuppence for paper and strings
You can have your own set of wings
With your feet on the ground
You're a bird in a flight
With your fist holding tight
To the string of your kite
..


First let me just say, I'm very sorry that it's been many many days since I posted a blog. Between the Walk to End Alzheimer's, a 17 month old and school, I've been very busy. It's not always possible to set aside time to actually write out a blog. I have been able to craft a few things and since I had a few minutes I thought I would share them with you.

Let's Go Drag a Kite - Bonus Adventure Fail #1

I was reading the Summer issue of Baby & Toddler magazine while in the waiting room of my daughter's pediatrician. (Ms. Bean's fine, it was a check-up) And in the back was a craft section and one of the crafts they suggested was making a kite from things you have around the house. Admittedly this is a craft for older children, but since Vegas is never short on wind, I thought it might be a fun project to share with Ms. Bean anyway.

The instructions were overall easy to follow, but near the end they get a bit technical. I've never tried to make a kite before and I got a little lost. Oh, don't try to improvise, use the materials they suggest. For instance, I used wrapping paper for the sail (wind catching material) and chopsticks for the spars (framework), but the chopsticks were too heavy and I'm sure that's one of the reasons it wouldn't fly. 

Bean seemed to have fun dragging the kite all over the back yard and standing on it, so it wasn't a complete bust. I am fairly certain that no one will be calling me a kite-smith, either.
Bean dragging her kite around
So here are a few pictures and the steps it takes to make a kite.

Step #1
Trace your pattern on to your sail material (see below) and cut it out.
It's supposed to be a cat, but it could easily be a bear or a dog
Step #2
Fold sail in half to confirm if it's symmetrical. Trim if necessary.

Step #3
Decorate the surface of your kite. This is the side that the framework will be attached to, so keep that in mind.

Step #4
Tape the spars to the front side of the kite. (pattern below)

Step #5
Tape your tails to the bottom of your sail (see pattern below) I used a plastic store bag cut it into strips for my tails. They recommended a looped tail, but I didn't read that part originally. Since my kite didn't really fly, I think that is probably a better idea then what I used.
See how my tails are fluttery? Apparently I shouldn't have snipped them & just left them connected in a loop.

Step #6
Reinforce the towing points (see pattern) with a piece of tape and poke a hole in each taped area. With the
decorated side facing up, attach the bridle. Here's where it gets a little technical. It may behoove you to check the internet for instructions that are little clearer than my summary.
Pattern - I have no idea if you can read this. I'll try to post it on Pinterest and link that here.
Step #7
Okay, so now you suspend the kite and pinch the bridle in the middle and attach a knot with a loop at the end. Make sure when the kite is suspended by the loop that both sides align. Yeah, I have no idea if I did this part right.

Step #9
Tie the flying line securely to the bridle loop.

And your ready to fly.

Or stomp on it, as the case may be.
Here's the first page of the instructions with the materials suggestions:

Overall it's a cute project that has nice potential, especially if your kids are a little older. I highly recommend reading up a bit on kite making just to make sure that the instructions make sense to you, because I was winging it the whole time. With that said, I'd like to try this craft again, maybe in the spring and see how it turns out.
 
And that concludes my first Bonus Adventure Fail!

Stay Crafty! and remember..  
Sucking at something is the 1st step to getting sort of good at something. 
Jake from Adventure Time

Sunday, September 16, 2012

Updates, Updates, Updates and Randomness (prt1)

For disappearing acts, it's hard to beat what happens to the eight hours
 supposedly left after eight of sleep and eight of work.  ~Doug Larson

I really do take on too much. My brain just doesn't seem to grasp that we really don't have as much time as it thinks we do. Between Toddler care, school work, trying to maintain some semblance of order regarding my domicile, family obligations, pop up projects (ie broken things and last minute items) and squeezing in just enough time to watch an episode or two of Boardwalk Empire before passing out for the night, well, I just don't have time for much else. With that said, please be patient with me in regards to my blog postings over the next couple weeks. I'm pretty sure they are going to be a bit erratic.

Let's do this - Updates Begin, Now!
Walk to End Alzheimer's
The fundraising is going really well. However, I have only been sharing the Las Vegas Ladybugs Team page, and since I also have a personal goal, this week I'm sharing my personal page. No matter which team member's page you donate through it all goes to the Las Vegas Ladybugs goal and ultimately to the Alzheimer's Association.

Don't forget every $10 donation gets you an entry into the raffle for the Date Night & Dinner for a Week drawing. Every $25 donation gets you five entries. It's a cool prize and a great cause. (original blog post - Excelsior!)

As always we greatly appreciate your support, whether you make a donation or just share my fundraising page. Every little bit brings us closer to our goal.

Las Vegas Ladybugs Team Logo! By team member Tina Verde
 

Part Deux
Here are the pictures from the baby shower I promised:

Blankie- 'Mike' side for a Monster's Inc. themed nursery
Blankie- 'Sully' side


Woobies the cute all purpose baby gift
Beanie trying very hard to reach the top of the shelf
Soon to be mommy - Becca <3

This week I did a few random Bonus Adventures and I'll post those updates over the next couple days. I also finished one Craft Adventure Venture, but I haven't taken pictures yet, so as soon as that is done, I'll post that too.

Finally both the Walk to End Alzheimer's and Halloween are fast approaching. I need to get t-shirts, signs and doodle bob headbands made for the walk and Halloween costumes completed. For the next couple weeks that's what I'm going to focus on for my Craft Adventures.

Thank you again for your support and donations to the Las Vegas Ladybugs fundraiser for the Walk to End Alzheimer's and keep up the great work.

Stay Crafty!

Sunday, September 9, 2012

I Should Have Named This Blog The Hapless Crafter

Don't think it hasn't been a little slice of heaven...'cause it hasn't! - Bugs Bunny

Where do you even start with the week I'm having? Let's just say it's been a bit rocky all over and move on.

Going with the Flow
I have come to the realization that Friday blog posting might not work for me while I'm in school. While both of my classes are Online, they still come with a pretty intense course load and I'm using Friday night as a big study night. It's hard to think about writing my blog when I'm stressing about an assignment. Most of my due dates have been Wednesdays and Saturdays, so if I push my blog post day to Saturday, I should be good. Hooray for new blog day!

Being Part of my Community
If you didn't read my previous blog you may not know that I'm participating in the Walk to End Alzheimer's this October. My fundraising got off to a rocky start, but I think we have the situation in hand now and it seems to be getting a fairly decent response. Still lots to do, but I'm very confident that our little team will reach our goal. If you would like more information please read my previous blog -Alzheimer's Walk Blog. As I said in the blog, any donation is greatly appreciated. But spreading the word is also very helpful, so please share the blog or the Team Fundraising Page and help us get the word out.

The Fuggaley Blanket
This week I did not finish a Craft Adventure Venture, I was only able to complete a Bonus Adventure. That wasn't my intention, but that's how it turned out. You see, my daughter kept snagging the left over ultra cuddle fleece from a previous blanket project and carrying it around. I seriously couldn't keep her away from it, so I decided I would just turn the left overs from other projects into a blanket for her. It was supposed to be a fun, easy, quick throw together blankie and then I could move on to other things. It turned into a 3 day ordeal that ended in the ugliest blanket I've ever made. To be fair, Ms. Bean doesn't see to care or notice; but I know and it bothers me. I don't know if you've noticed, but I don't have a lot of patience and some of my projects really irk me and I end up just plodding through it or throwing my hands up and saying Lump This! That's what happened here.

First let me say that I have no idea what happened. I measured my left over piece for the back and figured out the number of squares I would need for the front and I still somehow ended up needing a random square to finish the pieces. By the way, 16 month olds do not make good blanket assistants. I still have no idea what happened to the 2 squares of green fabric she ran off with. She must have a really good hiding place cause I looked ALL over.

Side Note:
(This will probably work for all quilty type blankets, but I only every make the patchwork kind, so if you are planning on something a little more intricate, I'd do a search on the ol' interwebs.)
Figuring out the number of squares you will need for your blanket top - You measure the blanket back, in my case it was 36x24 and then divide by the size of square you want to use. I was planning on using 6" squares so I divided both 36 & 24 by 6 = 6 & 4, so now you know you will need 6 -6" squares across and 4-6" squares wide. If you multiply these two numbers together you get the total number of squares needed to finish your top - 6x4=24. Then you take the number of fabrics you are using, in my case it was 2 and divide that by your total - 24\2 =12. You will need 12 -6" squares of each fabric.

Back to Blankie - After fighting with my daughter about who gets the scissors, which fabric she could play with, chasing her down the hall to get the squares back and trying to convince her that I really did need that piece of soft fabric, I put Ms. Bean down for her nap and actually made some progress with the blanket. But as I was sewing my squares together..

Side Note:
Right sides together, 1/4" seam, end to end until you reach your row length, (6 pieces for this project). Then you take your rows and right sides together, 1/4" seam, side to side till you reach your width (4 rows across). Then you square up your top & you should be ready to sew it to your back piece.

..I realized that I had somehow missed several pieces of the green fabric and that I was 1 piece short for the total blanket top. I did my math, I counted my squares, I really do not know what happened. I found a cute piece of fabric, that totally doesn't go with the rest, but by this time I just wanted the lumping* thing finished and finished the top of the blanket. At this point it was quirky, but still looking okay as far as blankets go. Normally at this point I would put the front and back pieces together (right sides), sew all around except for about 3" and flip it inside out, but this time I thought, well I'm using that left over binding, why not just top stitch the two together and cover that with the binding and it will save me some time. Famous last words.

What I have discovered is that ultra cuddle fleece, while one of the softest man made materials I've ever felt is a gigantic pain in the lower extremities to work with. It's slippery, doesn't play well with other fabrics and sheds like a collie in mid summer. Despite vacuuming there are still tiny fluffy blue fabric bunnies blowing around the house. Unless I absolutely need to, I'm not using it again. There are other really soft fabrics that don't frustrate me so much and I'll stick to them. So yeah, the top and the bottom didn't really match up because ultra cuddle fleece is a big fat meanie, but I hadn't yet given up. I still had the blanket binding, surely that would hide the imperfections. Nope. All I can say about the binding is that I finally figured out how to miter the glomping* corners.

Links:
Using Bias Tape - http://www.youtube.com/watch?v=4fEv3VXPUEs
Miter Corners - http://www.youtube.com/watch?v=kkacizsdTkk

Fuggley Blankie is done, some of it's seams show, it's lumpy in the corner, it has puckers in places where the two fabrics didn't match up. I have to fix a place on the top where the mismatched fabric pulled apart from the other pieces. It's the worst blanket I've ever made. Even when I first started teaching myself how to make blankets, they turned out better than this one. Ms. Bean doesn't seem to care, she likes it, so I guess that's all that matters. *head shake* That muddled mess of fabric is going to become a cherished piece of her childhood and it's the ugliest thing I've made for her. I really should have named this blog The Hapless Crafter.

AND NOW...Cute pictures of the kid

It doesn't look bad in this picture
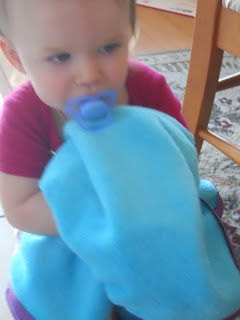
A blankie and a binky, what more could a girl ask for?


With her dolly & blankie on the couch


Total for this week - 0 Craft Adventure Ventures, 1 Bonus Adventure
Totals - 10.5 Craft Adventure Ventures & 1.5 Bonus Adventures
41.5 Craft Adventure Ventures To Go!

Stay Crafty my fellow adventurers! 
And in the immortal words of Dory the fish "Just Keep Swimming, Swimming, Swimming. Just Keep Swimming.'

*PG rated expletive replacement

Thursday, September 6, 2012

Making the World a Better Place - Excelsior!

UPDATE regarding fundraiser

This is just a quick blog to share some information and help out a great cause. I promise a more 'Craft' oriented blog tomorrow.

I walk almost every year for the Alzheimer's Association, it's a disease that has greatly affected my family and continues to have an impact even today. It's a group that I feel very strongly about helping and in most years it's just been me raising funds, sharing the Alzheimer's work and information and walking during the Walk to End Alzheimer's event. I always set lofty donation goals and this year is NO exception. The difference this year is that I have a group of wonderful people walking with me - The Las Vegas Ladybugs!

Made up of friends & family we chose the name in honor of my Mother who passed away two years ago from Early Onset Alzheimer's. (It's an inside joke that I'm sure would both embarrass and amuse my Mom.) Our donation goal is $1500 and I know that's a lot, but with dedication and imagination I'm sure that the eight of us will be able to do it or at least come very very close.

In order to reach our goal we need the help and support of friends and family. Not just monetary support, but by sharing our fundraising page and letting people know about our fundraiser. Each week we will share a new fun opportunity to help us reach our donation goal. (This week is the raffle for a great prize.) So please share this with your friends and family, the more people who see it the more chances for us to raise money and reach our goal!

Here is a link to our Team Fundraising Page sponsored by The Alzheimer's Association:
http://act.alz.org/site/TR/Walk/AZ-DesertSouthwest?team_id=53956&pg=team&fr_id=1591

UPDATE! After careful consideration, we have decided to change the format of our fundraising.  

This week starts a RAFFLE (no longer an auction) for this super cool prize below.
5 - Restaurant Gift Cards + 2 Movie Tickets = 1 Amazing Package (value aprox. $150)

The gift cards were a very generous donation from my cousin Kelli Adams Stein. 
Important Information
  • For every $10 donation made to the Las Vegas Ladybugs Team Fundraising page you will get 1 (one) Raffle Entry.
  • For every $25 donation made to the Las Vegas Ladybugs Team Fundraising page you will get 5 (five) Raffle Entries.
  • You MUST list your name with your donation on the Team Fundraising page to get your raffle entry. If you make an anonymous donation, I will have no way to verify your entry. Anonymous entries will NOT receive a raffle entry.
  •  Raffle is open to anyone 18 and over.
  • All proceeds go directly to the Alzheimer's Association Walk to End Alzheimer's. 
  • Donations must be made via the Ladybugs Team Fundraising page (http://act.alz.org/site/TR/Walk/AZ-DesertSouthwest?team_id=53956&pg=team&fr_id=1591) or in person via check made payable to The Alzheimer's Association.
  • Prize can either be mailed or picked up in person.
  • The prize includes all 5 of the gift cards and 2 movie tickets as a group and can not be pieced out. 
  • For more information or to make a donation please email me: professorflotsam@gmail.com


*Raffle will run from Friday, September 7th, 2012 at 12pm 
through Saturday, September 29th, 2012 at 6pm.
To receive your entry into the raffle you must make your donation via check (made out to The Alzheimer's Association) or online through the Las Vegas Ladybugs Fundraising page no later then 5:59p on Saturday, September 29th, 2012.

Raffle drawing will be held live via webcam on Sunday, September 30th, 2012. -More details to follow.


Thank you for taking the time to read this blog and it's update. 
Thank you if you share this blog or the Las Vegas Ladybug's Team Fundraiser page.
Thank you if you make a donation, even if it's only a few dollars. 
One more truly heartfelt Thank You if you participate in the raffle or any of the other fundraisers.

Sunday, September 2, 2012

Study Bees Aren't Bloggy Bees or I'm a Day Late & Dollar Short

Can I just say that going back to school after not being in school for 10 years, is overwhelming. And I'm not even full time. Maybe it's the little human, but I'm thinking I'm just rusty. On top of it all I accidentally signed up for an 8 week class, instead of the normal 16 week class, so it's all accelerated. Seriously, I should know this, it's only like Rule Number 1 - Read the Lumping* Directions! In this case, Read the Glomping* Course Info!

This week I had a baby shower gift to complete. It turned into a two-parter because the Future Mama didn't know how they were going to decorate the soon-to-be Baby's room and I had a really good coupon I didn't want to go to waste. I had a couple of ideas but settled on the combo of my 'Go To' baby gift - The Woobie (aka Burp Cloth) and a super soft baby blanket to match the room's decor.

The Woobie
I found the tutorial below*** while I was pregnant with my daughter. I had all these scraps of random, but super cute Japanese fabrics and had no clue what I was going to do with them and this project seemed to fit the bill. I made like 6 for myself and then 3 for a friend who was also pregnant. I think a set of 3 of these is such a cute, nice, very useful gift. Let me explain why - you see The Woobie is a multi-tasker and when you have kids multi-taskers are a life saver. The Woobie is more then a spit up catcher, it's also a sun shade, an impromptu carrier blanket, a neck roll so their little heads don't get all crooked in their stroller, a peek a boo curtain and yes, even an emergency diaper. And when they get older it can be a security blanket, a doll blanket, or you can turn it into a purse or backpack. I love The Woobie. I wish there was an adult equivalent. Anyway.. The new parents are huge Disney fans so I found some cute Mickey fabric and whipped up 3 of those bad boys.

The Blanket
Initially I was going to make something besides a blanket, because you get so many blankets when you have a baby. It's like the only gift people think of if they know they are going DIY on the present. My search for something other than a blanket didn't really pan out, I just didn't see anything I really liked. I had dabbled with the idea of a Tab Blanket and making it in a Disney inspired shape, but the finished product seemed too small and tab blankets can't pull double duty anywhere, so I nixed the idea. Then I was going to make one of those Rice Bags**, but they have dogs and I was worried that it would get eaten. Then I got an offer for a free pattern and that pretty much sealed it. (link below****) Their theme turned out to be Monsters Inc. I was really hoping to find a blue fabric with purple polka dots, but I couldn't find one. I'm still limited by lack of transportation, so I can't really hunt around. Instead I settled for a fabric in the correct blue called Ultra Cuddle Fleece. Even the name sounds squishy and cozy. It really is soft. In fact my daughter kept stealing it while I was trying to cut it down to size.

Yuup, Helpin'

Totally Helping
I kept the blanket really simple for time reasons and because I figured they would use it more if it wasn't all fancified. All manner of disgusting things come out of newborns and I remember not wanting to use some of my gifts because I knew they would be ruined. Blankie is made of super soft fuzzy Sully Blue on one side, a soft cozy flannel Wazowski Green on the other and I trimmed it around with the Sully Spot Purple bias tape. It's big enough that they can wrap her up when they go out, drap it over the stroller/carrier, lay it on the floor for Tummy Time, plus when they convert the crib to a day bed it will just cover the mattress. But wait! there's more! - it's all machine washable. You gotta love the multi-taskers.

The Blog Fail
As I mentioned on Friday, I blanked on the photos of the gifts. I even brought my camera to the party so I could take a picture of her with it and didn't take one. *thuppt* Instead here's a picture of the left over fabric and the one Woobie I had to fix before I give it to her. Do you see the kind of week I had. Too bad you can't feel how soft that blue fabric is, you would totally forget that it's not a picture of my awesome blanket.
Now just imagine a totally cute blanket.
Here's Beanie on the way to the shower in her cute frog dress and polka dot tights playing in the dirt. Cause that's what 16 month olds do.
Dirt all over the front of your dress is cool at a party, right
Total This Week - 2 Craft Adventure Ventures 
Grand Total: 10.5 Craft Adventure Ventures 
41.5 Craft Adventure Ventures To Go!

Links-O-Rama!!
Because I used so many techniques and tutorials to make these gifts I just lumped them all together in one place. It'll just be easier. With that said most of these I looked up originally for other projects and just used what I learned from them over & over. For instance, you can use bias tape for blankets, clothes, household items, costuming, it's pretty versatile stuff and knowing how to use it properly will save you headaches later. (I actually have a bias tape maker, but I haven't been brave enough to use it.)

Here's my favorite tutorial on using bias tape: (I think it's the popcicle stick faces. What can I say, I'm easy to amuse.)
http://youtu.be/4fEv3VXPUEs

For this blanket I copped out on my mitered corners. It just wasn't happening and I was starting to stress and when I'm stressed I make GIANT mistakes and cry.
Anyway here's a good tutorial on how to miter a corner while using bias tape. (So you don't cry.)
http://smashedpeasandcarrots.blogspot.com/2011/01/how-to-sew-bias-tape-tutorial.html

I had another bias tape tutorial, but somehow I lost it. Lame.

****Free Pattern!! I really like this website, lots of great information and you can take classes. I want to take a bunch of their classes, but I haven't had the time to set aside. Maybe over the semester break I'll sign up and take one. Or just sleep, either sounds great.
So, yeah, this is the tutorial that inspired the blanket. I've made blankets before, but the sizes always throw me. I have NO idea what size a blanket is supposed to be or how much fabric I need to make it happen. (One of the down sides from being self taught.) But this one sums it up nicely and gives you 3 options on top of it all.
http://www.craftsy.com/pattern/sewing/home-decor/receiving-blanket-pattern/10531

Speaking of blanket sizes, look what I found today on Pinterest:
http://www.craftastical.com/2009/08/tutorial-baby-clothes-quilt-from-start.html
BAM! Blanket Sizes! It's like the Gods heard my crafting prayer. I am making so many blankets.

Wait, what about the Burp Cloths/Woobies? - Here you go, but seriously the internet is full of Burp Cloth Tutorials. These will definitely get you started.
***My Favorite or the one that started it all: 
http://www.diaryofaquilter.com/2010/01/perhaps-easiest-burp-cloth-tutorial.html
And a few more just in case:
http://www.makeandtakes.com/baby-burp-cloth-tutorial
http://www.craftaholicsanonymous.net/super-duper-easy-burp-cloth-tutorial

I'm done now.  Stay Crafty!

*I'm trying to keep this blog PG so, feel free to insert any expletive you like best. 

** What the Lump is a Rice Bag? It's a little bag you sew and fill with rice and then sew a little sleeve around that. Then you can microwave it to put on your owies or you can throw it in the freezer to put on your boo-boos. They are actually really nice gifts for preggo ladies because near the end everything gets super achy and they make it feel better. They also help with swelling. Or at least they did for me.

Saturday, September 1, 2012

I think I may have bitten off more than I can chew..

No, I didn't forget to write my blog.

Yes, I finished my gifts for the baby shower and it was liked & appreciated.

No, I don't actually have a photo of it. Totally slipped my mind that I hadn't taken them until I had everything wrapped. And then at the shower I was supposed to take pictures, but Ms. Bean was trying to climb the wine rack and I was a little distracted. I'm working on getting one, one was taken, I just need to see if I can get a copy..

School is kicking my butt, so even though I really wanted to get a blog done tonight, it's gonna have to wait till tomorrow. But I am proud that I managed to turn in all my assignments for one class. I had 3 due in one week. Yikes!! Unfortunately, I still need to read like 2 chapters and take a test for my other class. Making time for my Craft Adventure Ventures is going to be tricky, but I've got to figure out a way to meet all my responsibilities, giving up is just not an option.

Also, I've decided that I'm going to auction off some of the Craft Adventure Ventures I've made to raise money for the Walk to End Alzheimer's in October. I've pulled a rag tag team together and we are the Las Vegas Ladybugs. We have a pretty lofty donation goal, but I think we can actually hit it if we all work together and stay on top of everything. We have a little over a month to do it.

Well I need to hit the hay, I've only been getting about 3 hours of sleep at night trying to squeeze everything in and it's catching up with me.

Update blog tomorrow, with photos I hope. *fingers crossed*

Stay Crafty!

Friday, August 24, 2012

Update Blog - Paper Silhouettes Revealed!

This week I wasn't able to complete a Craft Adventure Venture. Actually that's not completely accurate. I'll have it finished before I go to bed tonight, BUT I really didn't want another late night blog, so I'm calling it for this week.

I'll have super cute stuff to share next week, though. Baby Shower gifts are so much fun to make. Everything is so soft and cuddly. Sorry, I was distracted there for a minute by ultra cuddle fleece.

This week's blog is just an update from last week where I get to reveal the paper silhouettes that I made as birthday gifts. The recipients really liked them.

Just in case you missed it last week - Here is the link to the pieces that inspired these Craft Adventure Ventures: Handmade Silhouettes Etsy Store
(Lots of cute stuff in her store by the way. And I think I read that some of them are customizable.)

Craft Adventure Venture #7 - Part of Your World

Finished - No Frame. You can see the colors a little better

Finished - In Frame. You can see the depth best in this one.

So I had a couple issues with this one, but the picture was such a perfect layout that it really came together without much of a fight. I used cardstock for the silhouette pieces to give them a little more stability, but the background is scrapbook paper. I used glitter glue to highlight the water, her tail and as the stars in the sky.

Again, it's a really simple project that you need a bit of time to work on. You have to be patient and not rush through the cutting or you will cut something that was supposed to be left alone. Or you'll leave something and have to go back and correct it.

Just a note on negative space. What the heck is Negative Space? Paper silhouettes are all about negative space, so you really have to be discerning when selecting the picture you want to create. If it has too many details it's not going to translate well and no one will be sure what your subject is. But you also want it to have enough detail that it's interesting. Of course a completely sparse silhouette might be just your thing. It's Art after all, so who's to say.

The  How-Tos:

1) Find a picture that you like. Here, the moon was just perfect and it's pretty easy to figure out the figure and that she is sitting on a rock.
(Which I don't have the rights to use, but since it was a gift and I'm not selling these, I don't think they can say anything.)

2) Print out picture in the size you wish to work with - This is 8.5 x 11. But you can go up or down in size depending on what you want your finished piece to look like.
Print your picture in Black & White, (or Grayscale if your photo program doesn't give you that option), you'll use this as your template. The fewer fine details the better.

3) Cut out your pieces. For this one, I wanted to mimick the original piece as closely as possible with the dark background, light Moon and her in front. To do that I cut the Moon and reflection separately from the character. The paper I originally cut her out from wasn't really dark enough, so I went over the paper with a Copic Marker. It gave her a water colored feel that was a very happy accident.

Note - While I think this would still have been a nice piece in just black and white, no one says that silhouettes have to be duo-tone (two colors). You can have as many or as few colors as you like. Have fun with it.

4) Put the pieces together. The Moon is adhered with photo glue (non-acid glue stick) directly to the background. To give the character more depth I used foam dots to hold her in place.

Craft Adventure Venture #8 - The Pumpkin King

Finished - In Frame
Same how-to as above. For this one I used cardstock for the background, Moon and character. I used scrapbook paper for the hill and regular copy paper for the dog. I wanted the dog to seem a little translucent but I thought that vellum paper would be too much.

After I finished the piece I really thought it was too sparse and added more details that weren't there in the original picture I was working from. Even after retooling it a bit, I had some concerns. In the end the person who received it, loves it and that's all that matters.

These CAVs were for a couple, so I wanted to create a theme using the Moons. Even though the characters aren't related and the colors are different, seen side by side, it's clear they are supposed to be a set.

That's pretty much all there is. I'm looking forward to doing some more paper silhouettes in the future, I really enjoyed making them. Well, I need to pop back to the sewing machine and finish up those baby shower gifts. School starts next week, I'm nervous and excited and have no idea how I'm going to juggle everything. Where there's a will and lots of caffeine, there's a way.

My goal for next week is to not freak out, make some important phone calls and hopefully squeeze in an extra CAV to make up for this week. September is just around the corner, that means Halloween crafts and costumes. And the ban on knitting will be lifted and I have a charity project already in the wings. Till that time.. Stay Crafty!

This weeks totals: 0 Craft Adventure Ventures - total remains 8.
43.5 Craft Adventure Ventures to go!